Tone
Definitions
Tone
Tone is the lightness, brightness or value of a patch in a photograph: dark tones correspond to shadows, light tones correspond to bright or highlight areas. Tones are created by the way light falls on a 3D object. The parts of the object on which the light is strongest are called highlights and the darker areas are called shadows. There will a range of tones in between the highlights and shadowsZone System
Zone 0 is completely black and shows no detail in the image and this also goes for zone 10. These zones help create contrast in an image and helps produce the best settings or the image.
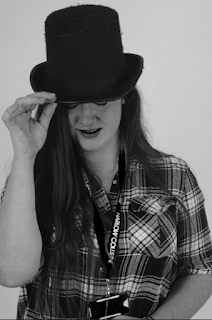
In this image there is a variety of zones, however there is more darker zones than lighter zones. This helps to make the model looking more intimidating. Darkened cheek bones and high cheekbones make the model look more masculine but along with the dark eye bags, chissled jawline and dark messy hair, the model looks tougher. Connotations of this image is that he's a delinquent figure who is tough and intimidating, the editing supports this.
Diffuse lighting
Harsh lighting
difference between marylin and that guy
diffuse lighting, a soft and flattering light.
Artist Research
Imogen Cunningham
Imogen Cunningham was an American photographer known for her botanical photography, nudes, and industrial landscapes. Cunningham was a member of the California-based Group f/64, known for its dedication to the sharp-focus rendition of simple subjects
Image Bank
Contact Sheets
Best Images
Images that need improvement
I have selected the following images as my model was not ready for the images and therefore shes blinking in the image or the image is blurry and unfocused. The second photo I have selected has a filter on which has interfered with the image and has ruined the affect of tone. It has also made the image too bright.
AO3: Record ideas, observations and insights relevant to intentions, reflecting critically on work and progress
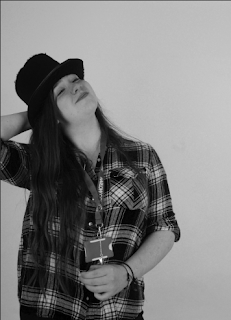
My idea for taking photos of shape was to explore the different tones in people and objects and to test the variety of tones that can be created with different objects, the model themselves and different lights from different directions. In this shoot I also started experimenting with using people as models and I started using objects to give the image another focus to match with the subject ( in this case tone). I believe that the hat I used in the shoot adds tone and a darker shade to the image which I could use later in photoshop.
AO2: Explore and select appropriate resources, media, materials, techniques and processes, reviewing and refining ideas as work develops.
Camera Settings
Photo Shop
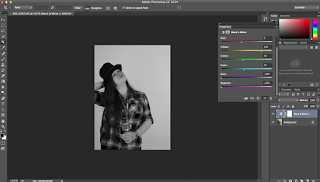
I have edited the following pictures in Photoshop to highlight and define the tones within the images. I have done this by putting all the images in black and white and making the shadows darker and brightening the highlights to create a contrast and variety of tones. I have also used curves and a paintbrush tool to further darken areas I felt could be defined further.
The images above show my edit and a screenshot of the settings I used to get this outcome. By using dodging and burning I can create a more finished look on my image. To get this black and white finished I created a black and white layer and then used the options to lighten and darken colours of my choice. To make the flower stand out more I made the background a lot darker and then made the flower lighter.
In these images above you have the finished edit and a screen shot of how I got this finished look> for the image above I made the image black and white and found that as much as I moved around the settings of the colours I couldn't get a finished look I was pleased with, this is probably because of the big differences between the light and the shadow on the brick wall. To further adjust the image I used a layer called curves, this adjusts tones to brighten, darken, add contrast and shift colours. By using this I was able to get a desired tone in both the dark and light side of the image.

The images above show my finished edit and also a screen shot of the settings I used. As i am using a model in this image there was a lot more editing that needed to be done before I made the image black and white. First of all I used the blemish tool to get rid of any unwanted blemishes in the photo that stood out once the image was in black and white. This helped to keep lighter tones consistent of light tones, an example would be a bruise as this would appear as a darker tone on the lighter tone (the skin). I then adjusted the colours to create a variety of different tones in the image. The same applies for the two images below.


AO1: Develop ideas through sustained and focused investigations informed by contextual and other sources, demonstrating analytical and critical understanding.
The artist research of Imogen was helpful as it helped me view objects from a different light to find deeper tones and shadows which I could then further enhance on photoshop. I loved using Imogen as a relating artist has I love taking images of flowers and editing my images in black and white.
AO4: Present a personal and meaningful response that realises intentions and, where appropriate, makes connections between visual and other elements.


No comments:
Post a Comment